")


Privacy screen
assembly procedure
FRAME CONSTRUCTION
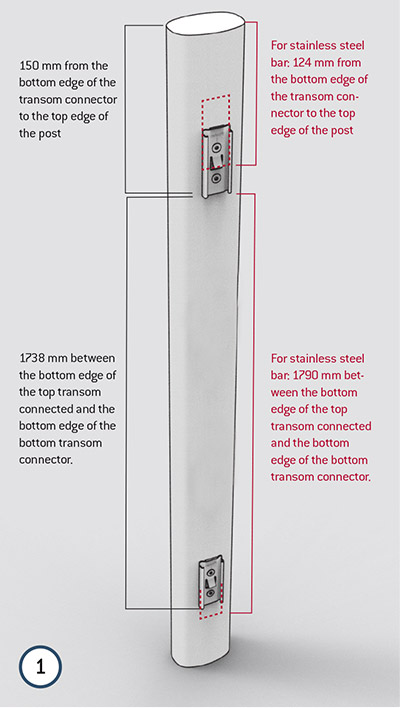
1. Screw the "Post" connecting part to the post. On the frontal sides of the transom, centrally position and screw the "transom" connecting part. Using a 5.5 mm drill, pre-drill and countersink the holes to 35 mm. (The bar connector is pre-assembled on the stainless steel bar.)
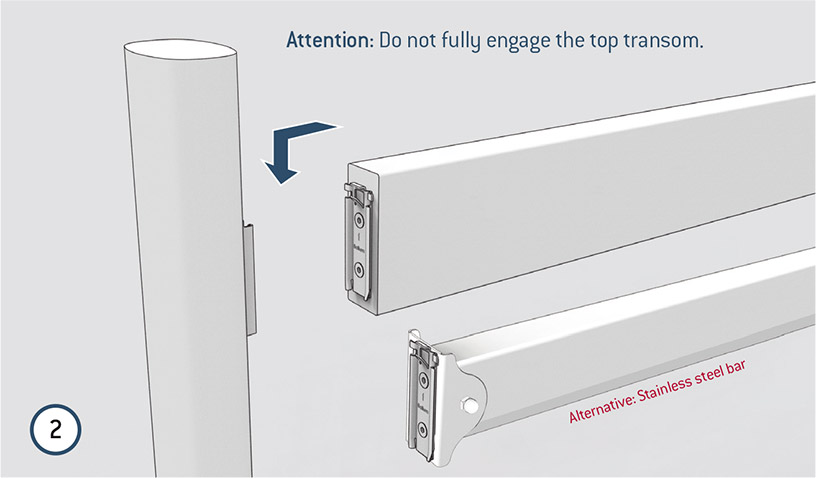
2. Fully engage the lower transom on the post. Apply the top transom but do not fully engage.
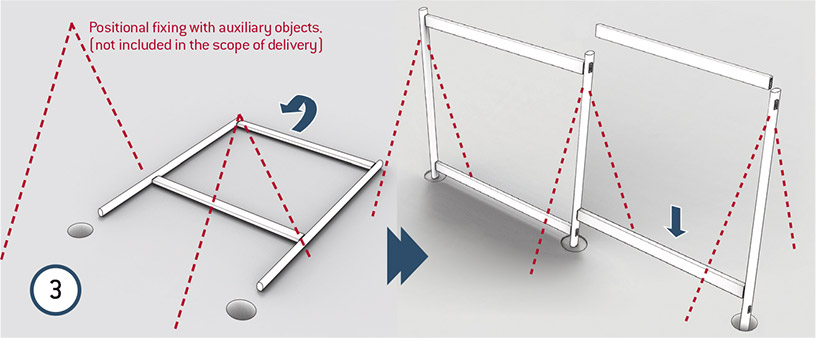
3. Position the pre-assembled frame and vertically fasten in the foundation (encased in concrete/screwed). Please see "Anchoring options". Create all further frames. In order to do so, screw the "Post" connecting part to the next post. Centrally position and mark the "transom" connecting part to the frontal sides of the transom. Using a 5.5 mm drill, pre-drill and countersink the holes to 35 mm and screw into place. Vertically fasten the post in the foundation, fully engage the bottom transom and apply the top transom.
PANEL ASSEMBLY / STAINLESS STEEL BAR (a)
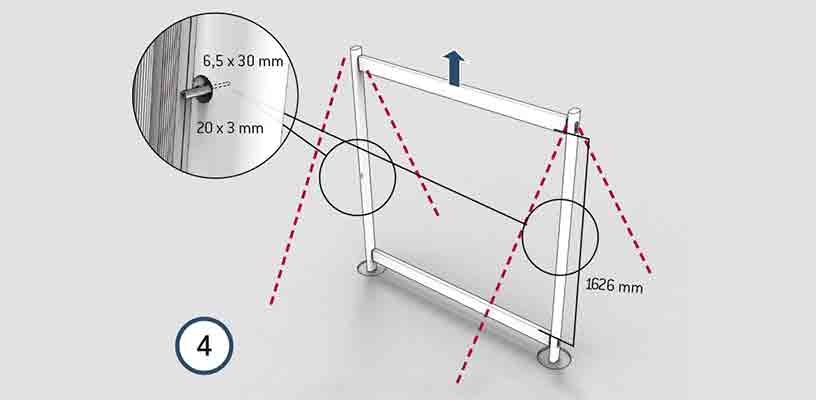
4. Remove the upper fence transom. When dealing with the side panel holder, pre-drill the hole to a depth of 30 mm (6.5 mm drill) in the centre of the post and countersink to a depth of 3 mm (20 mm) drill. Fasten the panel holder (please see detail).
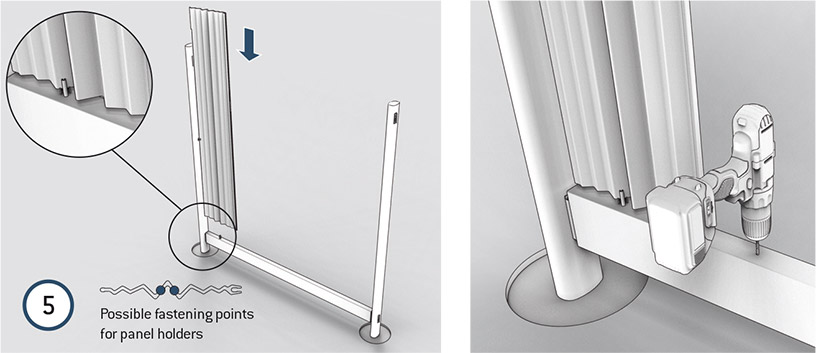
5. Insert the first panel into the side panel holder and determine the lower drill hole in the transom for the lower panel holder, then mark and pre-drill. Apply the lower panel holder to left or right hand side of the first panel at the centre of the highest corrugation. Insert the panel complete with panel holder (please see detail).

6. Determine the next drilling location, mark and pre-drill to a depth of 25 mm (using a 6.5 mm drill).
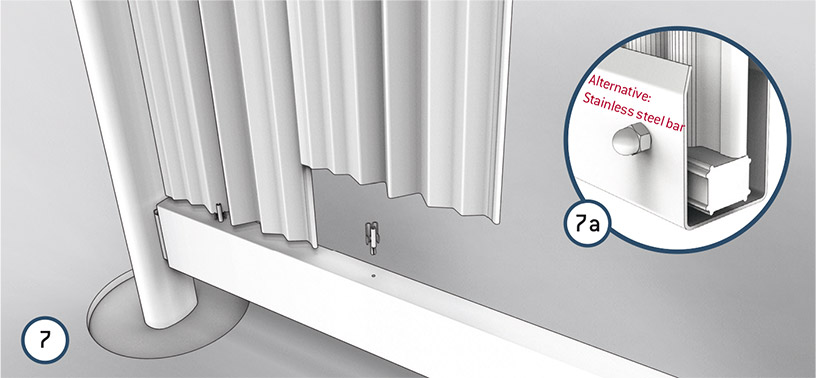
7. Connect the further panels by inserting into the previous panel and fasten with a lower panel holder.
7a. Place the insert bar into the lower stainless steel bar (in the event of horizontal structure) in order to align the height of the panels. They can now be positioned.
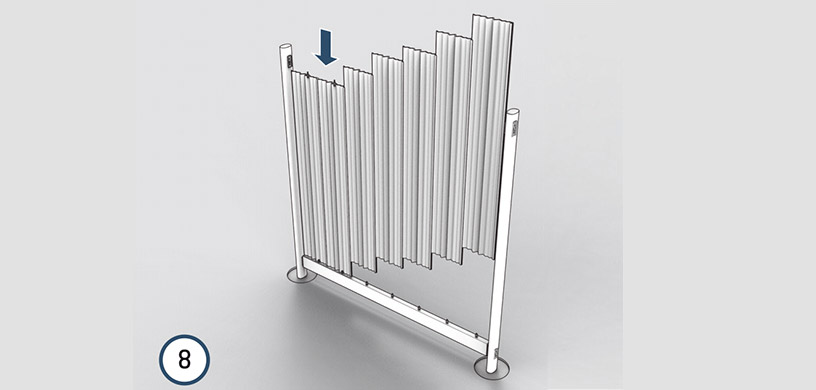
8. Insert further panels. When dealing with the last panel, pay attention to the additional side fastening with the panel holder (see details 4).

9. Equip the upper edge of the panel with the panel holders and apply the upper transom but do not fully engage. Precisely mark the position of the drill holes for the upper panel holder and pre-drill to a depth of 25 mm (6.5 mm drill).
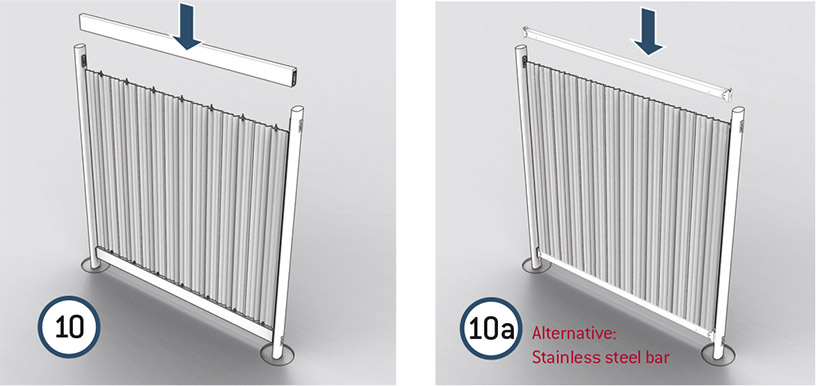
10. Apply the top transom and fully engage.
10a. Connect the panels by inserting into the respective previous panel. Apply the upper stainless steel bar and fully engage. Using a threaded pin and cap nut, fasten the first and last panel to the lower and upper bar (the holes in the bar have been pre-drilled).
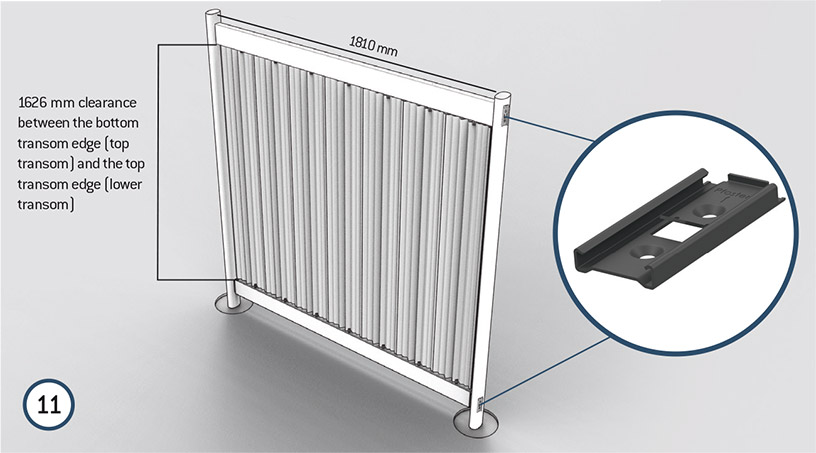
11. Assemble the next fence section in the same manner.
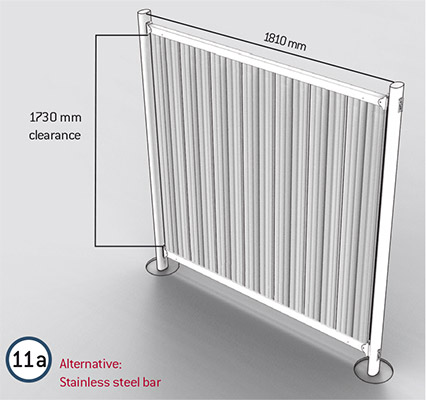
11a. Assemble the next fence section in the same manner.